Pawpawpsoft participates in several affiliate programs. We earn commissions for purchases made from our links. Learn More

VirtualBox is a popular virtualization tool, used by millions of tech users today. you can easily create and manage multiple virtual machines with the help of Virtualbox. The best feature of VirtualBox is that you can easily import virtual machine images in the form of OVA files. Importing virtual machine images into the VirtualBox tool is very easy and time-saving,
So Are you ready to import virtual machines into VirtualBox?
in this tutorial, we will guide you on How To Import Virtual Machine Images OVA Files in VirtualBox without facing any problem.
- Step 1. Just Open the Download folder on your computer where you saved the Virtual Machine image file.
- Step 2. The next step is to extract the VM image Zip file using 7zip or WinRAR.

- Step 3. Now Run the Virtualbox program on your computer.

- Step 4. Now Click on File option, then choose Import Appliances.

- Step 5. This will open the Import Virtual Appliance wizard. Click on the browse icon and click on the VM image file you extracted earlier.

- Step 6. Then you must browse to the location where you extracted the VM image file and click on it to open it.

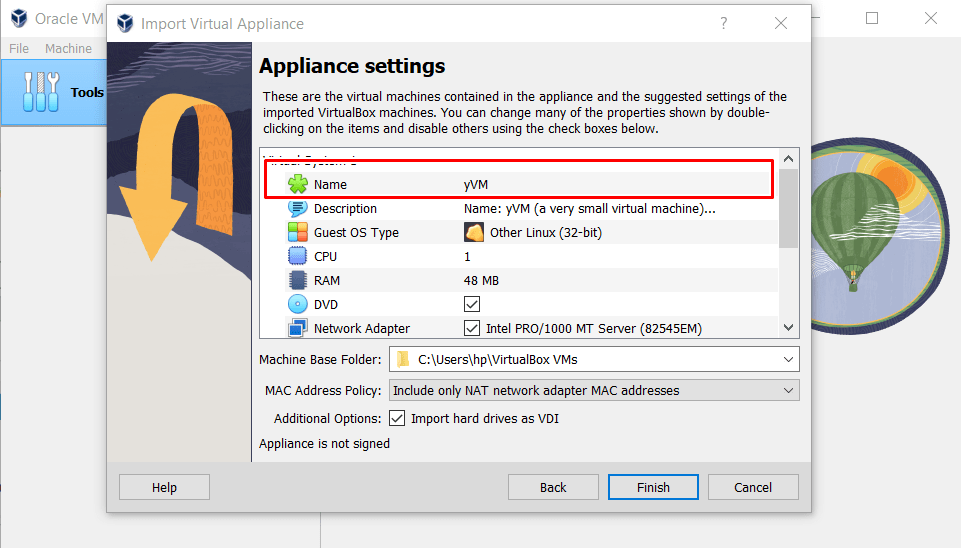
- Step 7. You can now change the name of the Virtual Machine and if you wish, you can also modify the other settings.

- Step 8. Choose the hard drive where you want to store and run the Virtual Machine, then click import.

- Step 9. Just click the Agree to Software License Agreement button.
- Step. 10. After this, VirtualBox will begin importing Virtual Machine images. The import may take a while, so be patient.
- Step 11. After the import is complete, your virtual machine is ready for use.

- Step 12. If you want to adjust the settings like ram, CPU, Processor, Network, input devices, removal devices or other setting before running, just right click on the virtual machine, click on setting and make changes as needed.


- Step 13. All you have to do is click the power button to start the virtual machine. Thank you


Final Word:
I hope I shared all the information regarding how to Import VM Images in VirtualBox in 2024 in the from OVA file in this post still want any help just comment below.


